photo source: https://containergardening.wordpress.com/
Our country’s present situation with this coronavirus outbreak, this national crisis has led the Filipinos, as well as the rest of the world, into this realization of the importance of food sustainability. We are now realizing how we should have been practicing home gardening even before this crisis.
And even though the local government units have been giving out these relief goods like rice, instant noodles, and canned goods to the people. It’s also become a growing trend, and a good trend at that – people are now growing fresh vegetables and seeds in their homes and backyards. So that they may have other sources of food and not just depend on the government.
The majority of Filipino dishes’ ingredients consist of a mix of vegetables. We mostly combine meat and fish with a variety of vegetables. Let’s take for example the most common dishes such as – Sinigang, Tinola, Menudo, and other favorites. Oh, and nothing beats a good old freshly pickled vegetable salad. 🙂
Think about it, you go outside the garden and pick some juicy tomato, still warm from the sun. Pick up some carrots and lettuce, and take them inside, you then prepare a nice salad for lunch and dinner. I believe that growing your own vegetables is like one of those practices that balances sustainability and indulgence.
Aside from the convenience of just walking a little bit to get your fix for a salad or light supper outside your doorstep or right inside your apartment, when you grow your own vegetables, you’re definitely getting the most nutritional benefits for your money too. Did you know that vegetables start losing nutrients as soon as they’re harvested, and the quality becomes lesser as sugars turn to starches?
READ: FREE e-Learning Courses for Agriculture and Fisheries
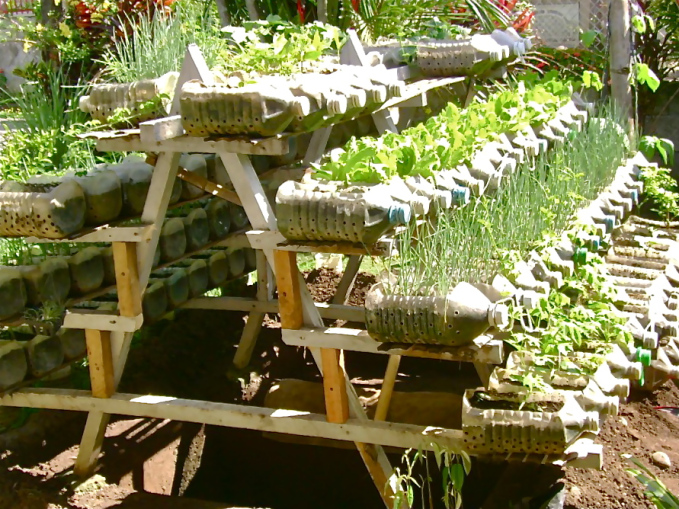
For appetizing vegetables with the best nutrition, start growing your own vegetables at the comforts of your own homes. Start by collecting seeds and or starter plants and don’t worry about not having a garden or a yard — most of these vegetables can be grown in containers too.
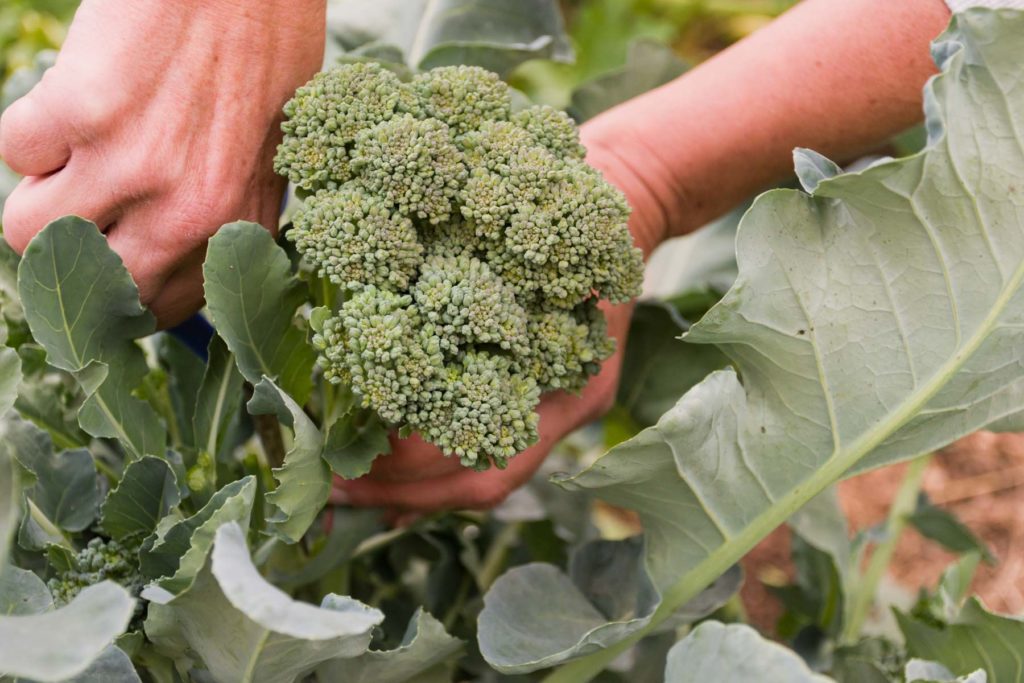
First off the broccoli, oh my word, I just love broccoli. They’re my favorite and cauliflower, and I get excited every time I eat them. It’s like eating tiny little trees you know. Broccolis are high in calcium, iron, and magnesium; as well as vitamins A, B6, and C.
Growing broccoli has become a common vegetable plant for many backyard veggie gardeners. They’re very easy to plant, maintain, and harvest – can be grown both in traditional gardens as well as in container gardens. You can either start growing them from seeds or purchase broccoli seedlings at your local garden center.
Broccoli plants need 6 to 8 hours of direct sunlight daily, they are thirsty and do well with regular watering. An average broccoli plant will reach up to 2 feet tall and 18 inches wide and will produce one large head of broccoli. After it’s harvested, it generally produces a couple of smaller heads that branches out from the main stem – which can also be harvested and eaten.
After you’ve transplanted the seedlings, most broccolis are ready to be harvested in 50 to 60 days. After harvesting them, you can easily store them in the freezer and can last up to a few months. Then cook the broccoli as you please. My favorite’s broccoli with garlic and oyster sauce – so, so good!
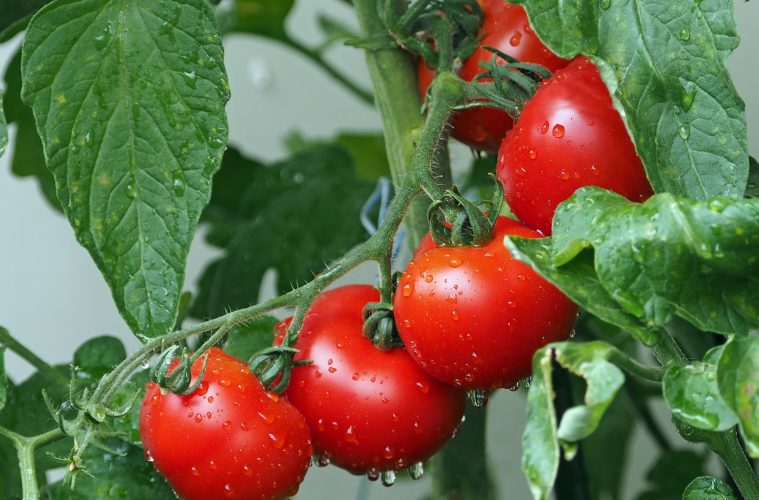
A lot of people have been growing tomatoes in their backyard gardens and it has become an annual practice. It’s actually a very good investment as a plant. Also, homegrown tomatoes taste much better than those you buy from the supermarket. You can just wait until your tomatoes are fully ripe, then you can pick them, and then eat them on the same day.
Tomato plants are easy to grow – easy to plant, care for, and to harvest. Plus there are hundreds of recipes that use tomatoes as one of their ingredients. They can be easily grown in containers or hanging baskets, and also in traditional gardens.
There are also a lot of benefits you can get from eating tomatoes – they’re packed with vitamins and minerals. Tomatoes also have lycopene, which according to studies minimizes cancer risk.
Tomato plants require fertile, well-drained soil and a lot of sunlight. Some tomatoes produce very early and can be ready to eat as early as 55 days from the time you transplant the seedlings into your garden. While other kinds of tomatoes can take up to 90 days for their fruits to be fully ripe.
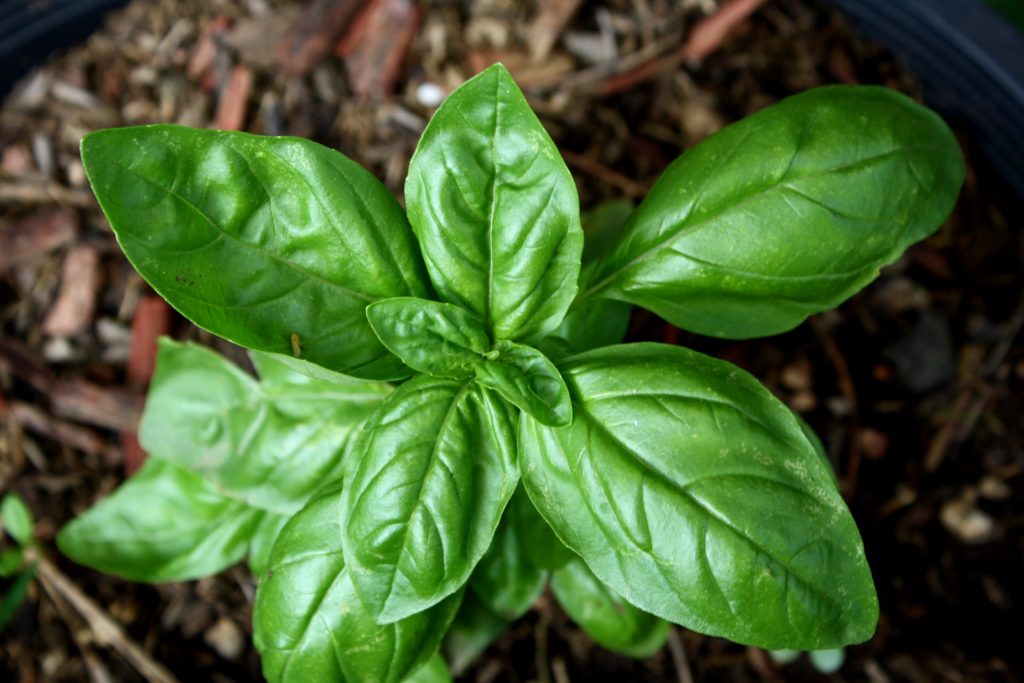
Who loves pesto dishes here? I know I do, as well as my son. His favorite’s Pesto Pasta, or as he likes to call it “green ghetti”. Teehee, and mine’s Tuna Pesto Sandwich. Not only are these dishes so easy to make and are delicious, but they’re also healthy too! Some people love growing basil for its amazing fragrance while others harvest the leaves to dry them or to make pesto.
Basil is an herb that’s simple to plant, easy to maintain, and even easier to harvest. They can be used to make different types of sauces or pesto, and even as an added flavor to their teas. Basil can easily be dried and used to season almost any kind of meat, poultry, seafood, and or vegetables.
These herbs vary in size – growing from 8 inches to 24 inches tall. Basil can be grown in a vegetable garden or in containers. These plants need at least 6 to 8 hours of direct sunlight every day and thrive when air temperatures are around 29 to 30 degrees celsius.
Basil is an annual plant – which means it will grow for one growing season and then die off. If you want to keep producing basil every year, you will need to plant more each year.
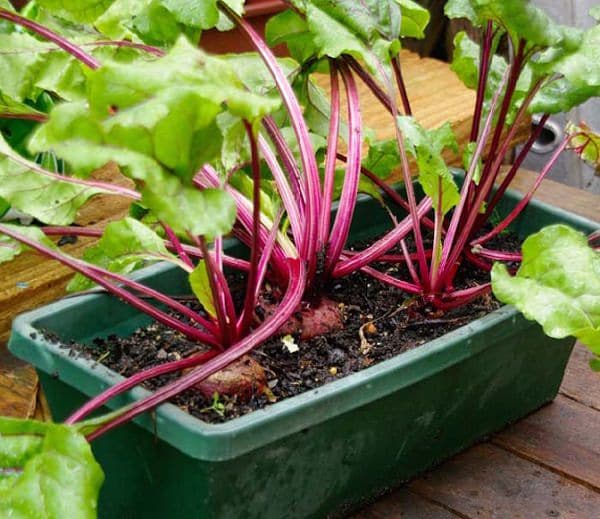
A glass of beetroot juice gives your body a whole lot of vitamins and minerals. They’re low in fat, packed with powerful antioxidants, rich in vitamin C, and are a great source of dietary fiber. You can now make your own beetroot juice from your own harvest when you grow beets in your garden.
One of the advantages of planting and growing beets is that they give you two different types of food – you can eat both the tops and the roots. The tops can be eaten raw – add them to your salads, you can also steam them, sautee or braise them. Beetroots can also be eaten raw, pickled, roasted, boiled, or steamed.
Beets are relatively easy to grow and they don’t take up a lot of space in a traditional garden. However, they are a cool-season crop and grow best when temperatures are 16 to 21 degrees celsius. The beets plants require lots of sunlight and should be planted in well-tilled soil that drains well.
You can also plant them in containers. They mature quickly, usually in 50 to 70 days, depending on the variety. Since beets are root vegetables, you should work the soil deeply enough to allow the roots to reach its maximum potential – use the hilling method giving it plenty of room.
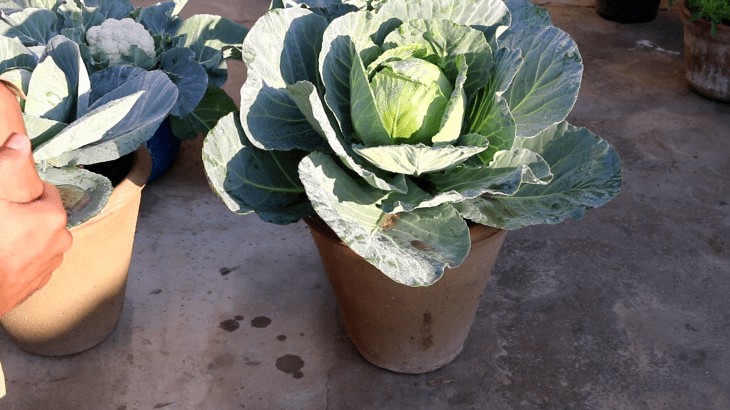
Another one of my favorite green vegetables – the cabbage. I like eating cabbages in a salad, pancit, chop suey, siomai, and a whole lot of other dishes. They’re so good, especially when fresh. I’m sure you’ll agree with me. 🙂 They’re a cool-weather crop, easy to plant, easy to care for, and easy to harvest as well.
Cabbage plants need 6 to 8 hours of sunlight per day and are generally not suitable for growth in containers. They thrive on cold weather temperatures 16 to 21 degrees celsius and the larger the cabbage head, the longer it takes to mature. If temperatures get higher than 26 degrees celsius for an extended time, the plants will stop growing and will bolt right away.
Also depending on the variety, cabbage plants are usually ready for harvest 45 to 105 days after planting. It’s important to leave enough space in between the plants as the cabbages can get quite large. Cabbages should also not be grown in the same spot two years in a row. Since it uses up too many nutrients from the soil in a single growing season. You should practice crop rotation and it will also help prevent disease problems in the long run.
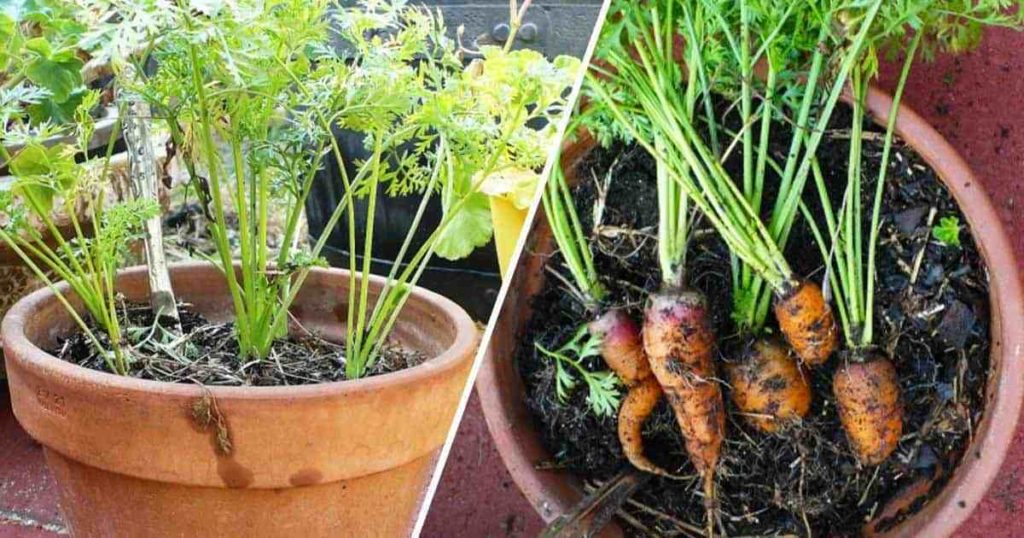
Oooh, what’s up doc? Carrots are a bunny’s favorite. And any veggie lovers too. You can add them in your fresh vegetable salad, make some coleslaw, steam them, saute, roast, and even use it in bread, muffins, and cake. You can also turn them into juice or mix with other fruits to make healthy smoothies. Yum!
Like cabbages, they’re also a cold-weather crop and thrive when soil temperatures are about 18 degrees celsius. Carrot plants also require a lot of sunlight and should be planted in well-tilled soil. They are simple to plant, easy to fertilize, and fun to harvest. They also do not take up a lot of space in the garden.
Most carrot plants depending on the variety are ready for harvest 60 to 75 days after planting. Carrots are suited for both traditional gardens as well as in containers. This makes them a great way to introduce children to vegetable gardening. I’m sure your kids will love this, planting, and especially the harvesting part. 🙂
After you harvest the carrots, you can easily store them for later – they can be canned, frozen, or dried. They will last and stay fresh in your fridge for up to 8 weeks.
Carrots are root vegetables, so it’s important that the soil is tilled deep when growing carrots. What you can do is till a couple of inches deeper than the carrots are expected to grow. And the soil should be loose and airy as they have difficulty growing in a dense and compact soil.
Carrots are an excellent source of beta carotene – that which the body converts to vitamin A. It also provides us with vitamins B, C, D, E, and K; and some studies suggest that eating carrots on a regular may help lower cholesterol.
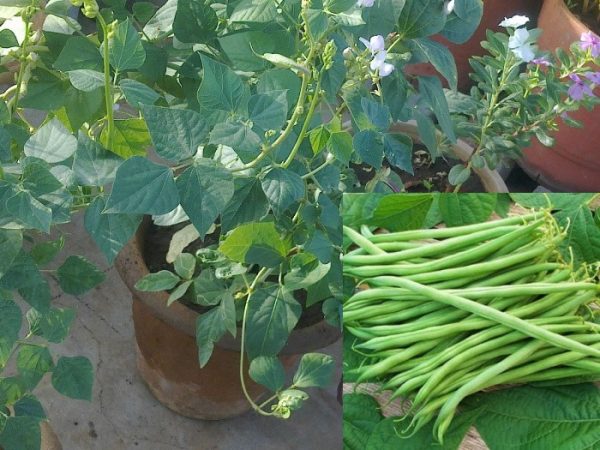
Another one of the easiest vegetables to grow are green beans. And have many uses in different types of dishes like some of our local favorites – like beans with ground pork and soy sauce. That’s also like one of the fast and easy recipes for a quick lunch or dinner.
Green bean plants don’t take up a lot of space and require very little maintenance. And the best part is that as long as you keep picking and its growing conditions are good then the plants keep on producing. They can be grown in traditional gardens and also in containers.
The beans can grow from 6 to 9 inches long depending on the variety. And most of them can be harvested 50 to 65 days after planting. The plants require at least 6 to 8 hours of direct sunlight every day and plant them on well-tilled, well-drained soil.
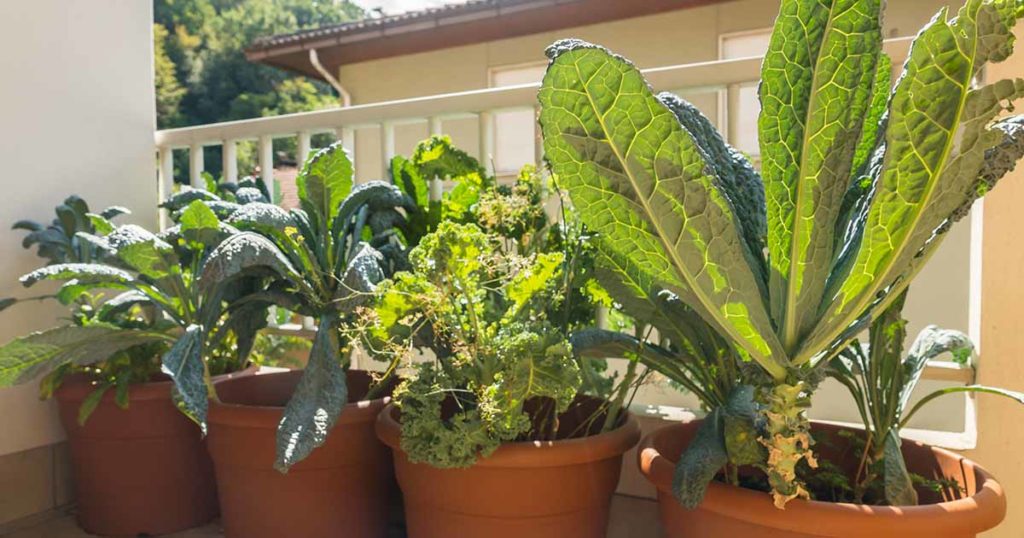
Kale became popular among weight-conscious and those individuals who are trying to lose weight. They are high in nutrients and fiber and because of its low-calorie content, it’s a great choice for juicing – together with other fruits and vegetables.
The most popular type of kale that’s grown in the country is the ‘Tuscan kale’, also known by other names such as dinosaur kale, Italian kale or lacinato kale. Growing the Tuscan kale is very easy – you just start with planting the seeds in a tray or any recycled cup punched with holes at the bottom for drainage.
The germination process starts within 5 to 8 days. Although during the summer months, germination may take a little longer than usual. You will need to expose the seedlings gradually to sunlight – start with 2 hours a day.
When the seedlings are at least 3 inches tall, you may now transplant the seedlings in a pot or on the soil bed. If you want bigger and more abundant leaves, use a deep container with at least 12 inches of width.
The soil needs to be consistently moist, water regularly, and deeply. The best time to grow kale is during the dry and cooler months — between November and February. Tuscan kale produces leaves that can grow to be 12 up to 18 inches in length. And they are usually ready for harvest in as early as 60 days.

Who doesn’t love snacking on camote fries and eating boiled camote with ginamos? Camotes or sweet potatoes are yummy even on its own and they’re an excellent source of fiber too. They can be used in different types of dishes and recipes. You can bake them, fry them, steam, boil, and or roast them.
Sweet potato or camote plants thrive in hot, humid weather, and they also grow in different soil conditions. They grow from sprouts that emerge from any sweet potato that you buy from the grocery or market. These sprouts are called slips, which you can also buy from a seed garden center or store.
To do this, leave the camote in a warm spot in your kitchen or pantry. Once it starts to sprout, submerge the unsprouted end in a jar with water in it. Once you’re ready to plant the slips in your garden, pull them off the camote by hand. Take note which end of the sprout was attached to the camote because this is what you will insert into the soil.
Each camote will produce 6 to 8 slips or more. And each slip will produce 4 to 10 pounds of sweet potatoes – depending on growth conditions. The camote plants require at least 6 to 8 hours of direct sunlight every day. The tops of the plants will spread out as vines and need plenty of space to grow.
And they usually are ready to be harvested after 90 to 110 days from planting. After you harvest the camote, you will need to cure them for 7 to 10 days to sweeten them up and toughen the skin so they can be stored longer.
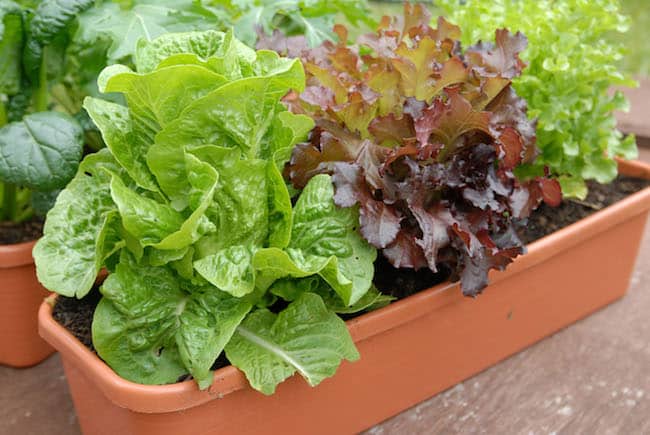
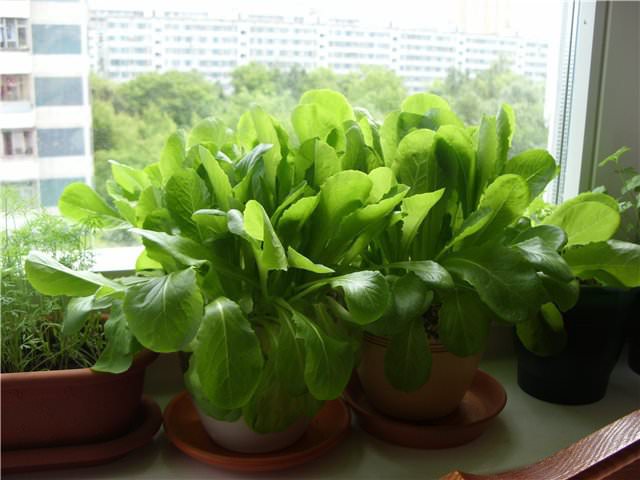
A lot of people like growing lettuce in their garden. There are different types of lettuce that you can grow in your own home. And I know you’ll agree that nothing tastes better than a fresh salad made from lettuce you just picked only minutes earlier. Ah!
It’s possible to get 2 to 3 lettuce crops per year, depending on the climate and the variety of lettuce you’re growing. Looseleaf and Bibb lettuce usually mature in about 50 days, but some variety is ready to be harvested as early as 25 days. Romaine and Crisphead varieties mature in around 80 days.
Lettuce, however, is a cool-season crop and its seeds won’t germinate when soil temperatures reach above 26 degrees celsius. They typically do better in spots with partial shade and require a steady supply of water especially during hot weather.
You can start planting lettuce seeds in containers and then transplant them later on or the seeds can be sown directly in the garden. Lettuce doesn’t take up much space and can be easily grown in containers.
Okra is probably one of those that aren’t many people’s favorite. I know I sometimes have to force myself to eat them haha! But I do know they’re good for you because they’re packed with nutrients. They can be fried, steamed, sauteed, pickled, or roasted. And some even eat them raw – they have this nutty flavor.
They are easy to plant – directly sow the seeds in your garden and they usually take a month to germinate. Okra grows really fast and is usually ready for harvest in about 60 days. They will keep producing pods as long as you keep picking them and the growing conditions are good.
Okra plants love and thrive in the hot weather. They require loose, well-drained soil and can be grown in both containers and traditional gardens. They should be planted in the sunniest spot and need a minimum of 6 to 8 hours of direct sunlight daily.

I love the smell of fried onions. I think it’s one of the best smells in the world. And I always enjoy eating them in steak, salad, or even raw – when you add them to soy sauce or patis. Ahhh! Lamia hehe. Matter of fact you can grow your own onions in your garden or backyard. Plus that would be so practical because these are used as an ingredient in thousands of recipes.
I honestly just love onions and they are so useful – you can fry them, saute, roast, and even add them on sandwiches and salads. Onions are packed with vitamins and minerals and can also contain antioxidants.
Onions are easy to plant, maintain, and harvest. They generally come in white, yellow, and red varieties. You may also get green onions or scallions by harvesting immature onion plants – before the bulb starts to enlarge.
When planting onions, the soil should be loose, well-drained, and airy up to a depth of 8 inches. And should be planted in a location that gets 6 to 8 hours of direct sunlight daily. You may also grow onions in containers because they don’t take up a lot of space.
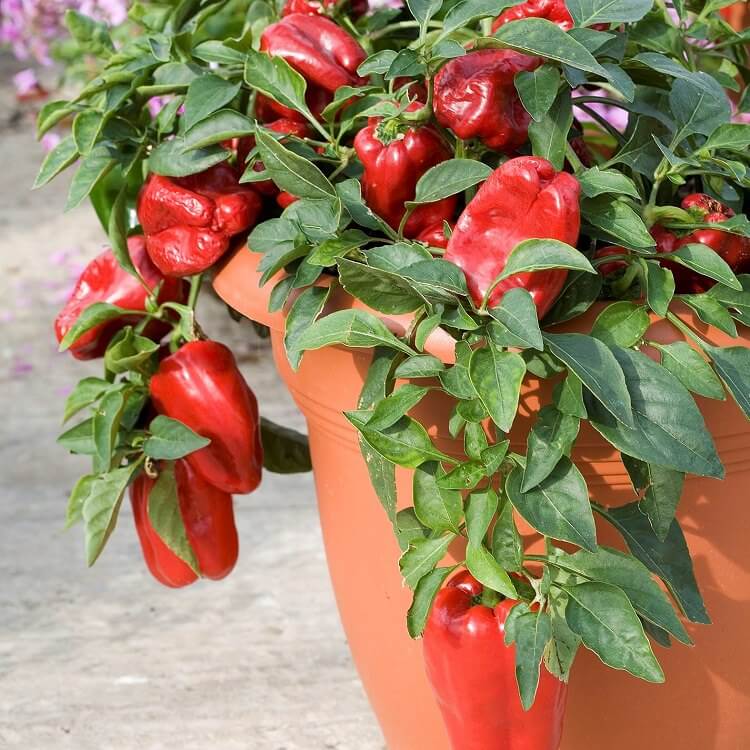
For those who love spicy food, growing peppers can become addictive – there are so many hot pepper varieties you would want to try. I love chili sauce myself, I like adding it to different dishes and even on fried rice. I think growing my own pepper and making my own chili sauce would be a nice practice.
Peppers can be grown both in containers and in a traditional vegetable garden. They can grow 2 to 3 feet tall and require at least 6 hours of sunlight. And depending on the variety of pepper that you plant, it will be ready to harvest 65 to 130 days after it has been transplanted into the garden.
Most pepper plants would thrive better in large containers to let the roots spread better and support the plant. An ideal container would be 18 inches in diameter and depth. Also, make sure there are enough holes at the bottom to allow proper draining. Use well-draining soil, mixed with compost and a little coarse sand.
Water the pepper plant – only when needed. Water them only when the soil gets dry. To check this, insert your finger around two inches into the soil and if it’s dry – that’s when you water it.
I love me some spinach sauteed in olive oil and some garlic. Spinach is a great source of vitamins A, B, C, and E, as well as minerals – making it one of the superfoods.
Spinach is a cool weather plant, the best time to sow the seeds is around November. Start by sprinkling a couple of tiny seeds into a medium-sized container – about 5 to 6 inches deep. Cover it with a thin layer of soil and then water the soil bed thoroughly. Make sure there is proper drainage and keep the soil moist but not soggy.
The seeds will start to germinate in 8 to 15 days. Spinach plants thrive even with partial sunlight – it only needs 3 to 4 hours of morning sunlight daily. Fertilize at the start of the growing stage – add compost or organic matter. Then, water the plants occasionally with rice water for that added lushness.
You can start harvesting your spinach in 45 to 60 days for the baby spinach – those used in salads. And in 60 to 75 days for more mature leaves – perfect for stir-fried spinach. To harvest, pull out the entire plant or cut the upper leafy part.

Kangkong – another one of those easy to cook and one of those green leafy veggies that many love to eat. Stir-fried kangkong with some garlic and oyster sauce and you have the perfect side dish. This plant grows anywhere, especially in areas with swamps. They are also known by other names like Water Spinach, Swamp Cabbage, or Chinese Watercress.
One can propagate Kangkong easily from seeds or through stem cuttings. Just sow the seeds in a tray or directly in a medium container or pot. There should be a distance of 3 inches in between the seeds. These seeds will germinate quickly in a few days. Then after a few more days, you can transfer the seedlings into a sunny location outside.
When you propagate Kangkong from cuttings, pick a healthy bundle of kangkong leaves when you buy from the grocery or the market. Cook the leaves but leave the top 6 inch part, up to the 4th leaf node. Then soak the lower end of the cuttings in water for a week – change the water every two days. As soon as the roots appear, you can now transplant the cuttings to your garden or in a container filled with rich loamy soil.
Kangkong plants grow well in partial or full sun, but it only needs at least 4 hours of sunlight for it to grow more leaves. To keep the soil moist, water it regularly and deeply so the deepest roots are reached. The leaves can be harvested in as early as 60 days from planting.
Harvest the Kangkong by cutting the top leaves but leave 2 leaf nodes from the roots. New stems will grow from those leaf nodes in a couple of days. When grown in containers, fertilize with compost or organic fertilizers every 3 months to ensure healthy growth of new stems and leaves.
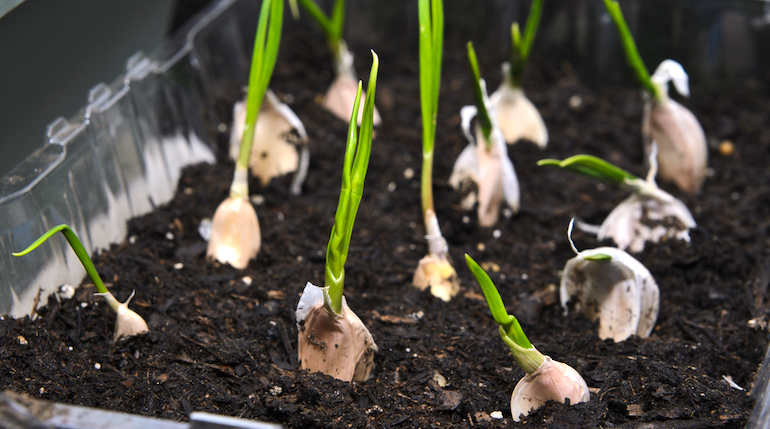
I have said this before — but I just love the smell of garlic. It just smells so good and it’s probably my favorite part when cooking something. Hah! 🙂 Also, did you guys know that native garlic has a stronger flavor and you would only be needing a few garlic cloves to savor up any dish?
Garlic typically grows best during the dry season – starting in November until May. You’re likely to grow smaller bulbs during the rainy days when you grow it during the rainy season.
Start with a few garlic cloves. Begin the process by sprouting the cloves indoors by arranging them – the pointed tip facing upwards in a small bowl or cup with enough water to moisten the lower tip of the cloves.
After about 8 to 15 days, the cloves will start to germinate. Then, once you see that the sprouts are about 3 inches tall, they can now be transferred to container pots or directly to the ground.
When you choose to plant the garlic bulbs directly to the ground – they should be buried individually with the pointed tip facing upwards. And the depth should be around 1 inch from the surface.
Growing garlic in a container.
For those who wish to plant garlic in containers, choose a container with at least 10 inches in depth. The deeper the container, the better – because this will allow the roots and bulb to form properly and is likely to produce bigger bulbs. Place the plant in a location that gets full sun and use mixed sandy/ loamy soil with lots of organic matter or compost.
Give each garlic plant at least 4 inches of space between them. Water the soil once every other day. Also, make sure to use a well-draining soil to allow excess water to properly flow out.
After 5 to 6 months, the garlic bulbs should be ready for harvest. At this point, some of the outer leaves will turn brown or yellow – which means that they are ready to be harvested.
With the use of a plastic knife, soften the soil around the roots before you gently pull out the stalk. Then carefully pull out the bulb and don’t pull too hard or it might get snapped off. Give the newly harvested garlic to air dry for 2 weeks before using them for cooking.
Who here loves a delicious tinolang manok and ginataang malunggay with kalabasa? These are just two of the many simple recipes you can cook with malunggay. Plus the malunggay plant can be grown in the city or countryside. You can find almost every household or one of your neighbors has a big tree of malunggay.
The malunggay plant can grow up to 9 meters and is commonly used for food and medicine. It can be grown in two ways – direct seeding or stem planting. They grow best in sandy soil but will also grow in most well-drained soils.
When planting a malunggay tree – make sure to plant it far from other plants or crops because they can be invasive and take all the nutrients from the soil.
Planting a malunggay tree through direct seeding method – make sure that the soil is wet enough before scattering the seeds. Then insert the seeds one inch under the soil. Plant each malunggay seed one meter apart from the other when you plant more than one seed.
The stem planting method is the most commonly used to plant a malunggay tree. It only requires healthy malunggay cuttings which are cut diagonally from the tree. Then these cuttings are planted directly to the soil. When planting more than one stem cutting, there should be a distance of 2.5 meters from each cutting.
Make sure that you plant the seed or the stem cuttings on clean and uncontaminated soil so that the leaves won’t have any trace of chemicals that could potentially harm those who will consume it. Other than that your malunggay tree should be fine. It’s known to survive in warm temperatures with direct sunlight and even little amounts of water.
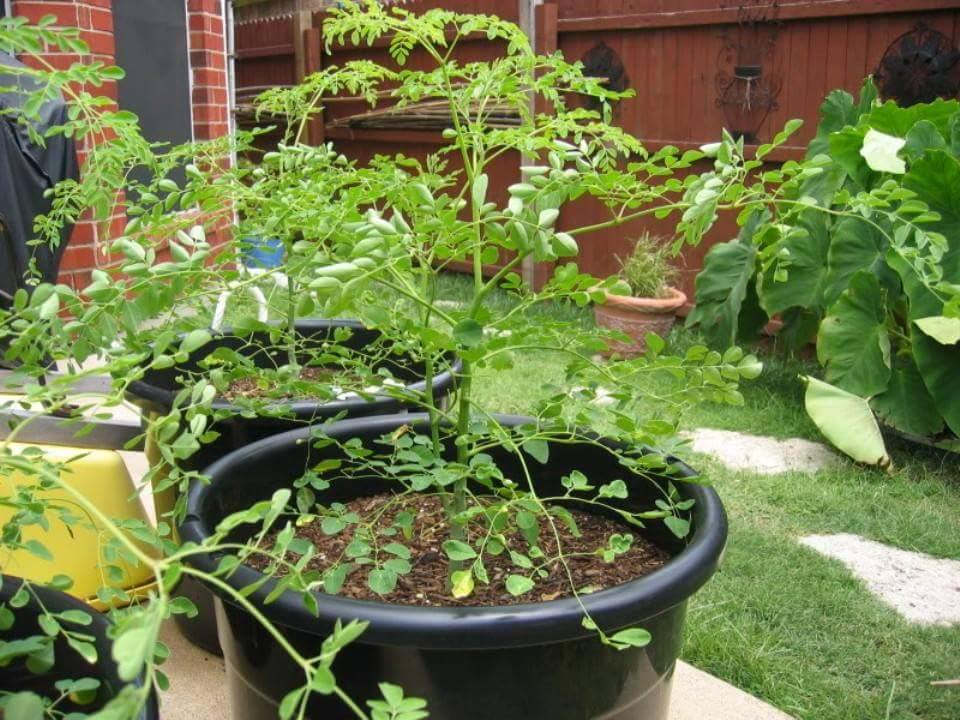
Growing malunggay in a container.
A fully grown malunggay tree can be quite big, it can grow more than 20 feet. However, you have the option to grow them in containers when you have limited space. And expect that the harvest would be limited – most likely you can harvest once or twice a week, depending on the size of the pot. The ideal post should be at least a 7-gallon container, but the bigger the better.
When you grow it from seed – cut off the top part by at least 1/2 of the plant’s original size when it’s at least 3 feet tall already. If you grow it from a cutting, trim the new main branch by half when they reach 2 to 3 feet in length. Be sure to leave a few healthy branches at the bottom – this will encourage the branch to grow more in the sides.
With regular trimming – the plant will be forced to grow more branches and leaves, rather than growing taller. Make sure to provide well-draining soil and water when the topsoil feels dry. The plant needs a minimum of 6-hour direct sunlight daily. And to encourage more growth in leaves – add a nitrogen-rich organic fertilizer every 2 to 3 months.
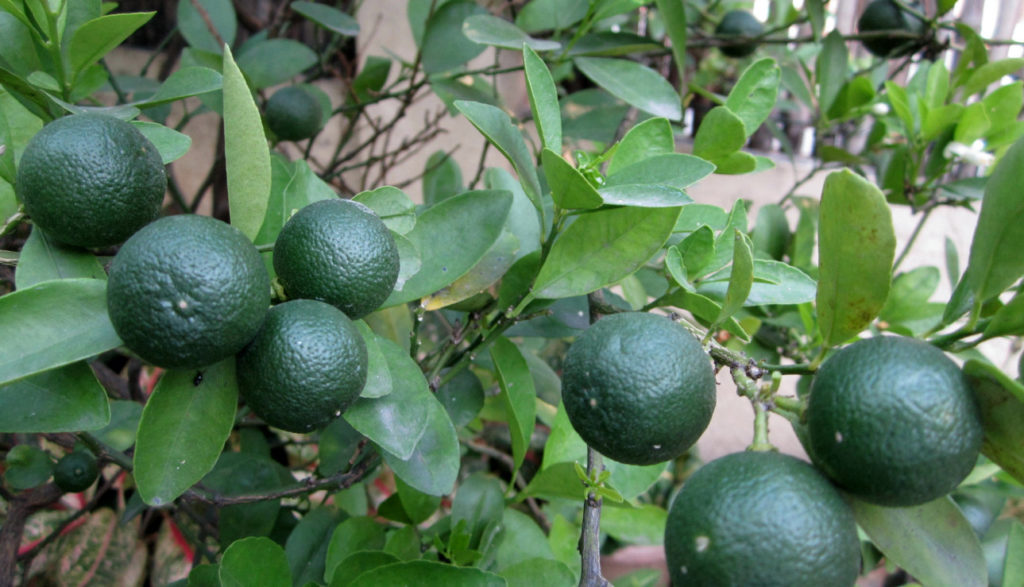
The calamansi is a popular ingredient in a lot of Filipino dishes. It’s the equivalent of lemon in western cuisine – its sour juice is usually added to most of the meat marinate or to add flavor to home-cooked meals combined with soy sauce or fish sauce.
It also has many other uses – including being used as a treatment for insect bites and sore throat, removal of stains and odor in fabric materials, and even as whitening the skin in some areas of the body.
Growing your own calamansi tree can be a very rewarding experience for home gardeners. And with proper care, it will continue to produce calamansi fruits year after year.
Growing calamansi in a container.
The tree can grow up to 5 feet when grown in pots, and can even grow taller when planted on the ground. You should transplant the seedling into a large container pot from the start. The ideal container for a calamansi plant should have at least 18 inches in diameter opening and 24 inches in depth.
Use a well-draining soil. When grown in a pot, the plant does not want to be soaked too much, or it may cause the roots to rot. Use a combination of sand and loamy soil, with lots of organic matter or compost.
Expose the plant to a lot of sunlight. For the plant to bear lots of fruits all year round, it should be exposed to direct sunlight at least 6 hours daily. Do not overwater – the plant will not thrive when the soil is too moist.
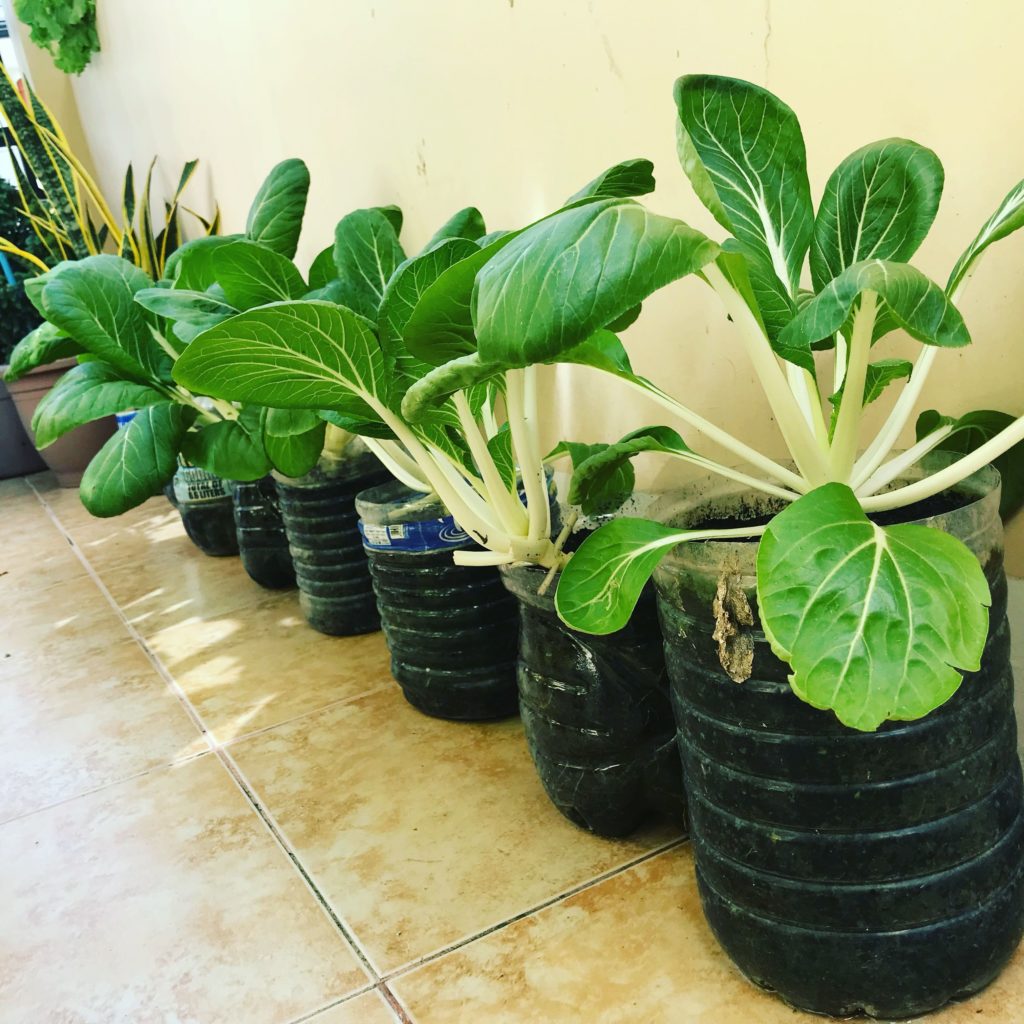
For those planning to plant pechay in their backyard or home garden, pick a spot that’s exposed to sunlight and is near the kitchen. Pechay plants need to get at least 4 hours of direct sunlight daily, for them to grow healthier and faster. Placing them near the kitchen would make it convenient for you to water the crops with rice wash or even meat/ fish wash. These are actually good for the plants as they contain nutrients and minerals.
Construct a stand to elevate the pots – so you can maximize the use of space. Fill your pots with organic humus soil or compost. When you decide to plant through seeds – plant one seed in a small pot and two seeds in a bigger pot.
When you plant the pechay in containers, they do not grow as big as they would if they were planted in farm lots. But with a good soil mixed with compost, they can provide a good amount of harvest for the gardener.
There are two ways to harvest pechay – first is to cut only the mature leaves around 1 to 2 inches from the root base. The plant will then grow new leaves which you can harvest again after a few weeks. The second option is to pull out the entire plant from the soil.
Note that pechay leaves are likely to be attacked by pests – the leaf miner and flea beetle. But you can deal with this by using common organic pesticides. You can buy from your local gardening shop or make your own solution – combine canola oil, dishwashing soap, and water.
Pechay or pak choy is a great starter plant for those looking to start home vegetable gardening. They thrive easily in the tropical setting and they will give you a big sense of fulfillment after every bountiful harvest. 🙂
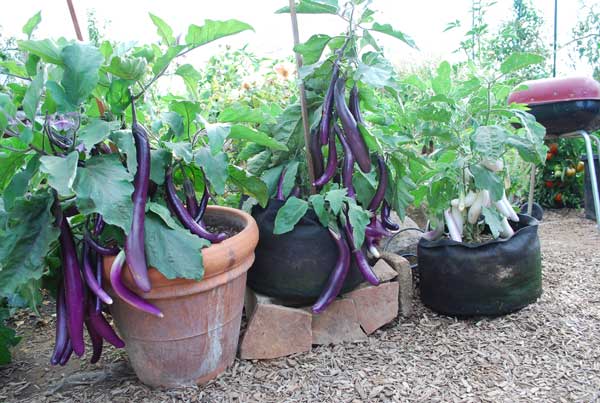
Another favorite of mine – tortang talong! It never gets old ahhh! I swear it’s like a treat for me every time I have it. It’s just so good, right? And growing them in your vegetable garden can be a very rewarding thing. There are several types to choose from when it comes to eggplants – in size, shapes, and colors.
Like tomatoes, eggplants are also hot weather plants. They grow during short and hot seasons. When choosing a location to place your eggplants, find a good spot with direct full sunlight – at least 6 hours of direct sunlight daily.
The soil should be fertile and well-drained. Eggplants thrive well in moist soil – water regularly and especially when they are young so that they develop deep roots.
When harvesting – wait until each eggplant is a mature size for its variety. But you can also pick those that are not yet fully mature. When eggplants are smaller, the fruits will be tender in texture and flavor. Don’t leave eggplants to stay on the plant past maturity because it will not retain its quality.
To harvest eggplants – use scissors or shears because pulling them off will cause you to damage the plant, the fruit of both. You can also only store them for about a week in the fridge, they don’t last long. It’s always best to eat them fresh so its quality is still good.
Growing eggplants in containers – always pick out a large container that’s at least 24 inches in diameter and depth. The best time to plant them is during the summer and by the time summer ends – the plants will be old enough to produce.
Also, trim away excess leaves and branches, leaving only 3 to 4 healthy main branches to allow the plants to focus on growing its flowers and fruits. To support the branches in their blooming stage – use stakes.
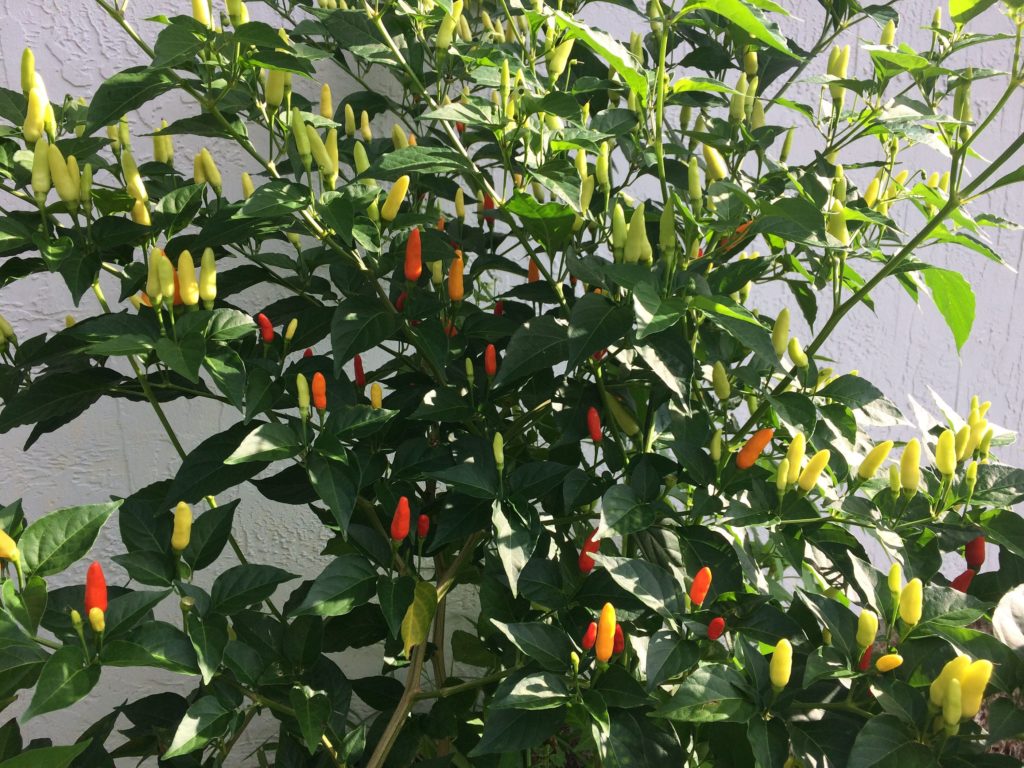
Two of my favorite sauces in the world – chili sauce from dimsum and sweet chili sauce! Ayayay! Lami kaayo when paired with different viands. Did you guys know that sili/ chilis are actually good for you? In moderation, of course. They are high in vitamins A and C, and capsaicin – which aids in promoting vascular and metabolic health.
The fruits of the sili plant are also used as ingredients in soups, stews, and sauces. Aside from the chili and sweet chili, we typically add sili on our suka or patis for our grilled pork or any bbq sawsawan. What’s great about these hot goodness is that you can start growing them in your backyard. 😉
Siling labuyo thrives best around an environment with 26 to 27 degrees celsius. For those who live in cooler places, bring the container inside the house. Make use of sandy loamy soil. You can plant these in cans and plastic bags, aside from containers.
A pot that’s 10 inches in height and 12 inches in diameter is advisable. Make sure you use well-draining soil. Provide partial shade when it’s still a seedling. Water regularly. And wait until the seedling hardens before exposure to sunlight.
Once the sili plant is stable, they thrive best in sunlight. But it can also grow with partial shade. Fertilize with compost and apply water once a week or as needed.
After 60 to 75 days from planting your plant will bear ripened sili fruits and will be ready for harvest. You Can also extract seeds from the red sili fruits. Air-dry them and sundry the seeds for 3 to 5 days. Place them in plastic bottles or clear bottles, seal, and store in a cool, dry place, or store in the fridge.
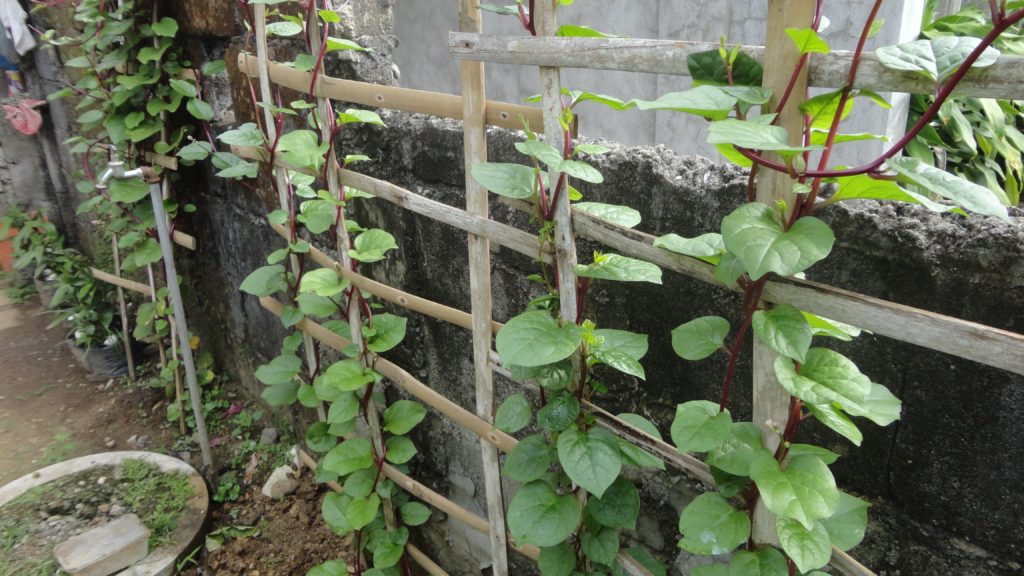
Alugbati, also called vine spinach, is an edible leafy plant that’s very popular in the country. I love eating alugbati with garlic and oyster sauce as well. It’s very fast and easy to cook – and makes a great side dish.
The alugbati plants thrive best in hot weather, so it’s a very ideal plant to grow. They prefer full sunlight and consistently moist soil. And you can choose between two methods to grow them – from seeds or from cuttings of an existing plant.
The alugbati plant thrives in soil that’s high in organic matter. Compost improves the soil moisture retention and drainage which helps in creating loamy soil that the vine spinach prefers.
Planting alugbati from cuttings. Take 8 to 10-inch cuttings from a healthy alugbati plant then soak them in water overnight. You can plant the cuttings in rows or hills. For cuttings in hills – put 3 or 4 cuttings in each hill; 6 to 8 inches apart. For cuttings in rows – cuttings should be 8 inches apart and row 8 to 12 inches apart. Water the cuttings right away and continue to keep the soil moist.
Planting alugbati from seed. Scarify the seeds by using a knife to cut the outer seed coat. Then plant the seeds directly outside – about 1/4 inches deep in rows that are 8 inches apart. Keep the soil moist.
You can harvest individual leaves from your alugbati plant as they mature and reach full size.
READ: FREE eLibrary for learners brought to us by Globe and DepEd
For those who would like to get a hold of the free seeds and seedlings, you may visit the Mandaue City Agriculture Office. The office is open from 9 AM to 2 PM at the Department of Agriculture compound across Pacific Mall Mandaue. Visit the Mandaue City Public Information Office for more information and if you have any inquiries. When you visit their office, please wear a mask and observe social distancing.
You may also buy seeds from your local garden shops or one thing I’ve done when buying plants is to check Facebook Marketplace. I’m sure you’ll find some seeds for sale in there.
We hope this article will help you out in starting your very own vegetable garden at home. Stay safe!